
 English
 Română
 Español
 Magyar
In the Feet tab you tick what you see on the skin and show on the drawing where each problem is, so it's easy to compare at the next visit.
Step 1 — Tick the skin condition
Open the visit record and choose the first tab, Feet. Turn on the switches for what you find, for example Dry skin or Callus.
Step 2 — Pick a mark
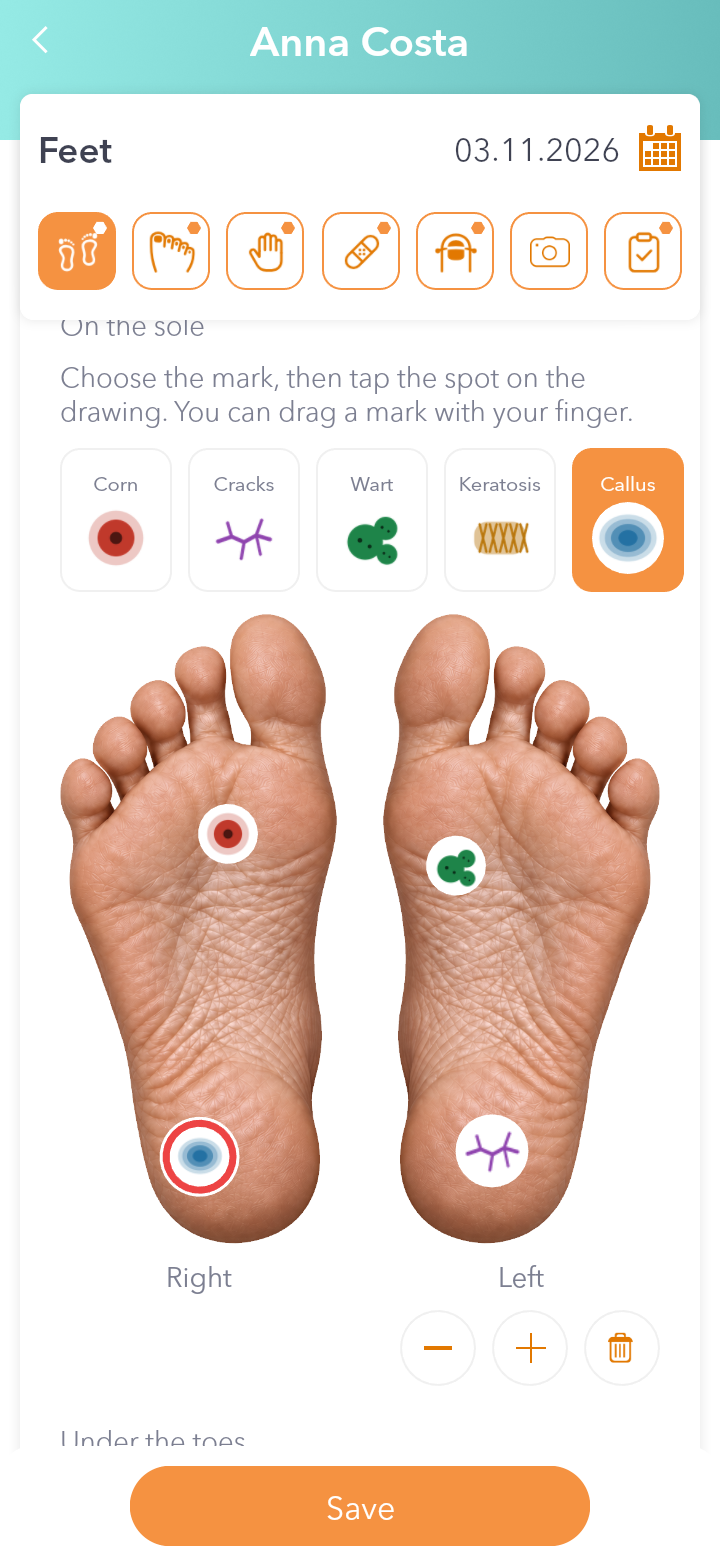
Scroll down to On the sole. At the top are the marks: Corn, Cracks, Wart, Keratosis and Callus. Tap the one you need.
Step 3 — Put the mark on the sole
Tap the spot on the drawing. The mark appears there, and you can drag it with your finger to move it. Use − and + to make it smaller or bigger, and the bin to delete it.
Step 4 — Mark under the toes too
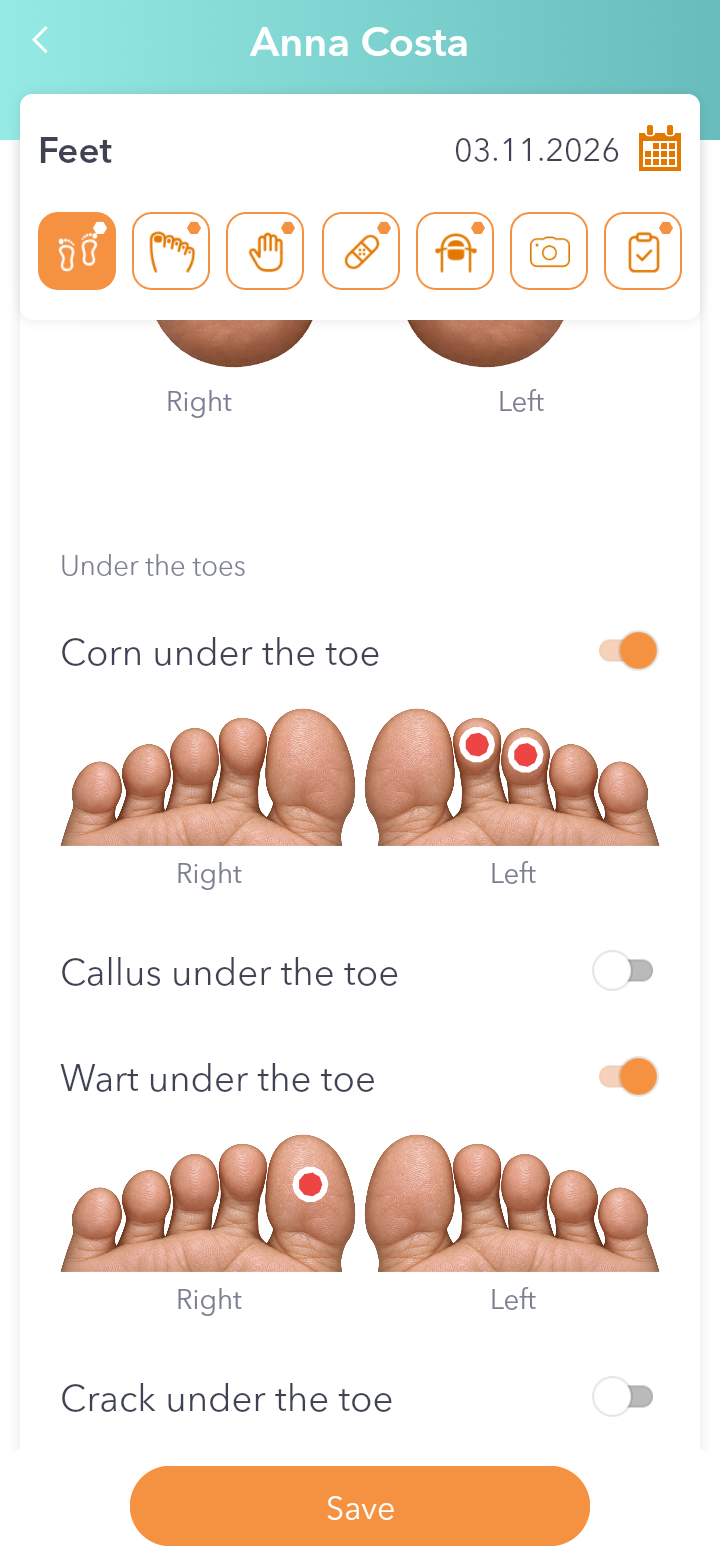
Further down, at Under the toes, turn on the problem, for example Corn under the toe. The toes appear seen from below, right and left. Tap the toes where the problem is.
Step 5 — Save
If there's anything else to say, write it in Notes. Then tap Save.